


Use onomeo in Pi
Pi is a small coding agent that works in the terminal and reads extra providers from one file. Follow the four steps below to write this site into that file and use its models.
A small coding agent for the terminal.
The three values it asks for
OpenAI-compatible
Use these details in any OpenAI-compatible tool.
No key yet? Create one on the My account page, then come back — the fields below fill in by themselves. Go to My account
Step by step
Install Pi
On Windows, press the Windows key, type PowerShell and press Enter. On macOS, open Terminal. Paste the line below and press Enter.
npm install -g --ignore-scripts @earendil-works/pi-coding-agent
Pi needs Node.js 22.19 or newer. If npm is not found, install Node.js (the LTS version) from nodejs.org first, then close PowerShell and open it again.
Save the configuration
Press Copy, paste the command into the same window and press Enter. It writes this site's address, your key and the model auto into Pi's models.json.
$f = "$HOME\.pi\agent\models.json"
if (-not (Test-Path $f)) {
New-Item -ItemType Directory -Force -Path (Split-Path $f) | Out-Null
[IO.File]::WriteAllText($f, @'
{
  "providers": {
    "onomeo": {
      "baseUrl": "https://onomeo.com/v1",
      "api": "openai-completions",
      "apiKey": "YOUR_API_KEY",
      "models": [
        { "id": "auto" }
      ]
    }
  }
}
'@)
Write-Host "Saved: $f" -ForegroundColor Green
} else { Write-Host "Config file already exists, left unchanged: $f" -ForegroundColor Yellow }
Replace YOUR_API_KEY in the command with your key. Once you create a key in this browser, it is filled in here.
The last line reads Saved in green when the file is written. If the yellow line "Config file already exists, left unchanged" appears instead, Pi already has custom models on this computer: open the file it names and add the "onomeo" part under "providers" by hand.
Start Pi and check the model
Go to your project folder first (for example, type cd D:\my-project and press Enter), then run the line below. Then type /model and press Enter: auto [onomeo] is in the list. Press Enter to choose it.
pi
![Pi's model list: auto [onomeo] is ticked, with Enter to select below it](/assets/guides/pi/model.png)
auto [onomeo] is this site. The model in use shows at the bottom right. Give it a task
Type what you want done and press Enter. Pi reads and writes the files in that folder by itself.
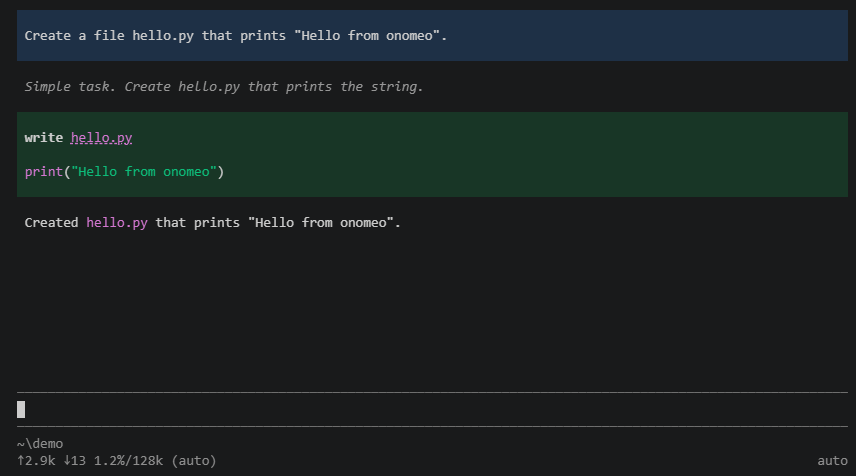
Here it was asked to create hello.py: it wrote the file and said so. Each step counts as 1 call, and a long step counts as several by its length. Measured on 9 October 2026 with Pi 1.1.0: the task above took 2 calls on auto and was not charged.
If it will not connect
- Keep /v1 on the end of baseUrl and add nothing after it; Pi adds /chat/completions itself.
- To add another model from the Models page, add another { "id": "name" } to the "models" list in the file. /model reads the file again each time it opens.
- Coding sends whole files along with each request. On free models that is not charged, but a long request counts as several calls; Claude, GPT and other big models are charged by usage, and the balance goes quickly.
- 401: the key is wrong; correct "apiKey" in ~/.pi/agent/models.json. 402: insufficient balance. Claude, GPT and other big models are charged by usage; top up on the Pricing page or switch to a free model.
- Once your own provider keys are connected on the My providers page, add { "id": "my/<provider>/<model>" } to the "models" list to answer on your own allowance instead. Nothing else changes, and this site does not charge for these calls.